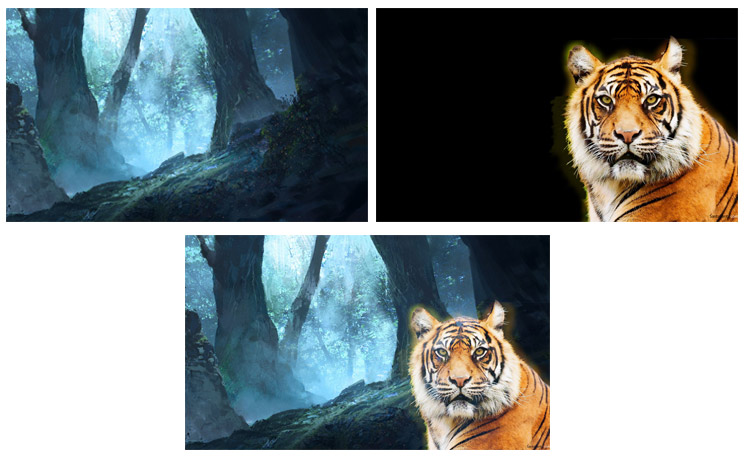
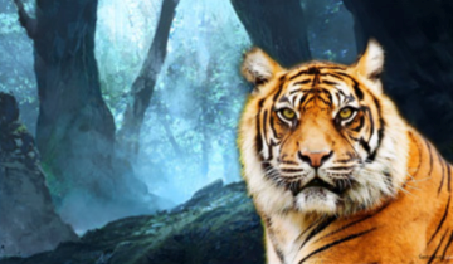
The following two photographs forest and tiger were blended into one with screen blending mode in Photoshop. How to accomplish the same result in Mathematica?

Although I think belisarius's result is prettier your example image clearly has the background visible through the dark parts of the tiger image, and since you wrote that you want "the same result in Mathematica" I propose this as a starting point:
{img1, img2} = Import /@
   {"https://i.sstatic.net/gPKY5.jpg",
    "https://i.sstatic.net/G39md.jpg"};

img2a =
  SetAlphaChannel[
   img2,
   img2 ~ColorSeparate~ "R" ~ImageAdjust~ {0.6, 1}
  ];

Show[{img1, img2a}]

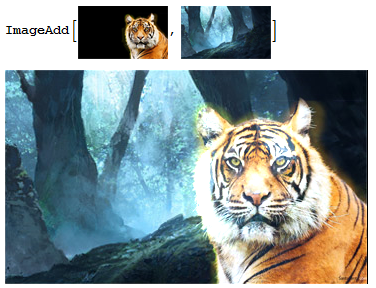
This method avoids the blown-out highlights of a simple ImageAdd operation.
You can vary the parameters of ImageAdjust to tune the blending. You can also try other channels besides red, or a combination by using ColorConvert[img2, "Grayscale"].
getBlacks[x_Image] := Binarize[x, .005]
isolateTiger[x_Image] := Erosion[getBlacks[x], 2]
getAreaToChange[tig_Image, fst_Image] := ImageMultiply[fst, Blur[ColorNegate@isolateTiger[tig], 30]]
addImages[tig_Image, fst_Image] := ImageAdd[getAreaToChange[tig, fst], tig]
GraphicsRow[{#, getBlacks@#, isolateTiger@#, getAreaToChange[##], addImages[##]} & @@ {tiger,forest}]


Edit
The following is more sophisticated, but the results are better (code partially stolen from here)
i = tiger;
b = DeleteSmallComponents@FillingTransform@ChanVeseBinarize[i, "TargetColor" -> Black];
skeleton = SkeletonTransform[b];
pruned = Pruning[skeleton, 1, 5];
mask = InverseDistanceTransform[pruned];
ib = Blur[Binarize@mask, 5];
f= ImageAdd[ImageMultiply[ColorNegate@ib, tiger], ImageMultiply[ib, forest]];
GraphicsRow[{i, b, skeleton, pruned, mask, ib, f}]


ImageAdd does the job. Blend allows you to adjust the blending level.
ImageAdd[tiger, background]

I had originally posted this only as a comment, because it was not clear whether the OP wanted something that was exactly like Photoshop's screen blending mode, or whether he just wanted to composite the two images together in a nice way like @belisarius's answer. Now that the OP has clarified that a replication of Photoshop's behaviour is indeed desired, I must point out that the accepted answer is not exactly correct.
Photoshop:

Mr.Wizard's method:

You can see that they are not identical.
The screen blending mode, as documented by Adobe, combines two images according to the formula $c_{\text{out}} = 1 - (1-c_1)(1-c_2)$. To do this in Mathematica, we can use ImageApply:
ImageApply[1 - (1 - #1) (1 - #2) &, {forest, tiger}]
and the same approach would also work for any other blending mode whose formula you know. For the screen blending mode in particular, though, there's a much faster way:
ColorNegate[ImageMultiply[ColorNegate[forest], ColorNegate[tiger]]]

As verification, one can check the maximum difference in pixel values between this and the Photoshop result, via Max@ImageData@ImageDifference[..., ...]; it is only about $1.6\%$.
Here's an approach based on wavelets
forest = Import["https://i.sstatic.net/gPKY5.jpg"];
tiger = Import["https://i.sstatic.net/G39md.jpg"];

swd = StationaryWaveletTransform[#, DaubechiesWavelet[8], 3] & /@ {forest, tiger};

forestVals = swd[[1]][{___, 0 | 1 | 2 | 3}, {"Values",
                      {"Image", "ImageFunction" -> Identity}}];

tigerVals = swd[[2]][{___, 0 | 1 | 2 | 3}, {"Values",
                     {"Image", "ImageFunction" -> Identity}}];

blended = MapThread[ImageAdd[#1, #2] &, {forestVals, tigerVals}];

InverseWaveletTransform[DiscreteWaveletData[
       {{0} -> blended[[1]],
        {1} -> blended[[2]]}], DaubechiesWavelet[8]]
As you can see I have compressed and fused both images in one step - you can always add/remove different wavelet coefficients, use ImageMultiply on the parameters in ImageAdd, use a different wavelet transform or just a different wavelet family - it's up to you :)
ImageAdd directly on the images.
$\endgroup$
ImageAdd[forest, tiger].
$\endgroup$
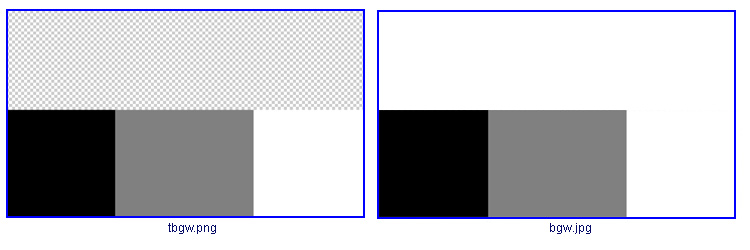
This is actually not an answer but a simple review of the answers given above. Screen blending mode is equivalent to Black passing through, White halt, 50% gray half through. So a picture containing four distinct areas, namely transparent, black, 50% gray and white can be used to test the outcomes of the methods given above. The picture tbgw.png below contains an alpha channel, and picture bgw.jpg contains no alpha channel.

First, is the output from Photoshop's screen blending mode:

Second, result from Paw's method by using Mathematica's AddImage which refused to add pictures with different channel numbers. So bgw.jpg was used for the blending. And please note that the picture was lightened under the gray area. Obviously, the blending effect from AddImage is not screen instead it is lighten.

Third, result from Belisarius' method: It is a kind of masking rather than blending actually, but the outcome of the answer above is awesome.

Finally, result from Mr. Wizard's method: It is pretty close to the result from Photoshop. It is really a true screen blending method in Mathematica.

{img1, img2} = Import /@
   {"https://i.sstatic.net/gPKY5.jpg",
    "https://i.sstatic.net/rr9EN.png"};
img2a = SetAlphaChannel[img2, img2~ColorSeparate~"L" ];
Show[{img1, img2a}]
Again, clean, short and straight to the point, thank you so much Mr. Wizard.
GrayLevel[0.75]. 2. @paw's method is not lighten (which is $c_{\text{out}}=\max(c_1,c_2)$) but add ($c_{\text{out}}=c_1+c_2$), also known as linear dodge in Photoshop.
$\endgroup$
ColorNegate[ImageMultiply[ColorNegate[forest], ColorNegate[tiger]]]and it should be identical to what Photoshop gives. $\endgroup$