6
$\begingroup$

Bug present in 10.2 and fixed in 11.2
Exporting to eps still produces a crash, but that is another bug.


Suppose I create a new Notebook:

nb = CreateDocument[{TextCell["PDF Test", "Section"],
                     Table[PieChart@Range@5, {7}]}];

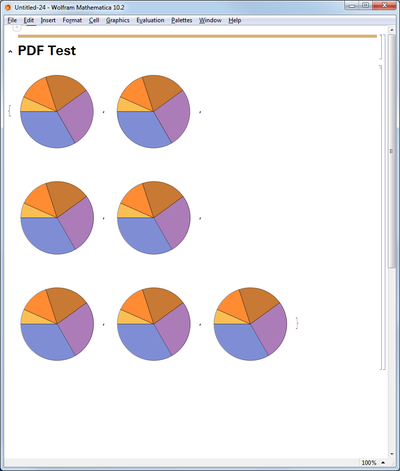
notebook

And set a big paper size so that all my charts fit in a single line:

SetOptions[nb, PrintingOptions -> {"PaperSize" -> 72 {18, 12}}];
SetOptions[nb, ScreenStyleEnvironment -> "Printout"];

wide-notebook

An then I want to export this as PDF. So I issue this command:

Export["test6.pdf", nb]

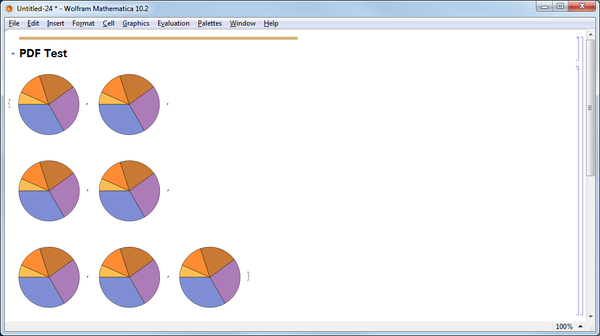
The result is that my notebook becomes:

notebook-narrow-again

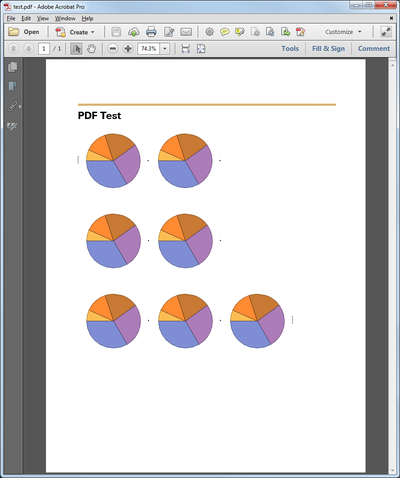
and the generated PDF looks like this:

enter image description here

And the "PaperSize" property is reverted to its default value

Options[nb, PrintingOptions]

{PrintingOptions -> {"EmbedExternalFonts" -> True, 
"EmbedStandardPostScriptFonts" -> True, "FacingPages" -> True, 
"FirstPageFace" -> Right, "FirstPageFooter" -> True, 
"FirstPageHeader" -> False, 
"GraphicsPrintingFormat" -> "Automatic", 
"IncludePostScriptResourceDirectives" -> True, 
"IncludeSpecialFonts" -> True, 
"InnerOuterMargins" -> {Automatic, Automatic}, 
"Magnification" -> 1., "OpacityRenderingMethod" -> Automatic, 
"PageFooterMargins" -> {Automatic, Automatic}, 
"PageHeaderMargins" -> {Automatic, Automatic}, 
"PageSize" -> {Automatic, Automatic}, 
"PaperOrientation" -> "Portrait", 
"PaperSize" -> {612, 792},
"PostScriptOutputFile" -> Automatic, "PrintCellBrackets" -> False, 
"PrintMultipleHorizontalPages" -> False, 
"PrintRegistrationMarks" -> False, 
"PrintSelectionHighlighting" -> False, 
"PrintingMargins" -> {{54, 54}, {72, 72}}, 
"RasterizationResolution" -> "Automatic", 
"RestPagesFooter" -> True, "RestPagesHeader" -> True, 
"UnixShellPrintingCommand" -> Automatic, 
"UsePostScriptOutputFile" -> False, 
"UseUnixShellPrintingCommand" -> False, 
"VertexColorRenderingMethod" -> Automatic}}

If I reset the PaperSize and use the File->Save As.. and used the PDF format, exactly the same happens. If one again I reset the PaperSize and print a PDF file using my new Adobe Acrobat licence, exactly the same happens (but it is slower).

So my question is: How can I get a PDF will all these charts in one row without changing their ImageSize? Is this a bug? Isn't the "Printout" screen environment supposed to match the PDF printout of a notebook? Why is the PaperSize notebook property changed when you Export or print a PDF? Can it be prevented?

I am using Mathematica 10.2 under Windows 7.

$\endgroup$
2
  • $\begingroup$ it works if you export to .tiff. Perhaps you can find some intermediate format that works and use an external converter. (.eps crashed on me by the way ) $\endgroup$
    – george2079
    Commented Oct 1, 2015 at 16:02
  • $\begingroup$ .eps crashed on me too. In my real application the notebook is several pages long, so I don't think that .tiff is an option. Maybe .rtf $\endgroup$ Commented Oct 1, 2015 at 17:23

3 Answers 3

5
$\begingroup$

You need to set the page size as well as the paper size. I can only test this in V10.1 but it works:

nb = CreateDocument[{TextCell["PDF Test", "Section"],Table[PieChart@Range@5, {7}]}];
SetOptions[nb, PrintingOptions -> {"PaperOrientation"->"Landscape","PageSize" -> {1296, 864}, 
"PaperSize" -> {1296, 864}}];
SetOptions[nb, ScreenStyleEnvironment -> "Printout"];

As an FYI if you set the toolbar to display the ruler you will see why setting the page size is required.

$\endgroup$
3
  • $\begingroup$ Unfortunately with version 10.2 this does not work: after Export["test6.pdf", nb] I obtain a PDF file which looks like this: i.sstatic.net/DuoyS.jpg $\endgroup$ Commented Oct 2, 2015 at 7:29
  • $\begingroup$ It did not work on my Win7 Mathematica 10.2, and I got a different result than Alexey Popkov: i.sstatic.net/KZ9f0.png $\endgroup$ Commented Oct 2, 2015 at 13:40
  • $\begingroup$ @GustavoDelfino you are using landscape dimensions but a portrait orientation. Try it again using Landscape. You may need to tweek the margins. $\endgroup$ Commented Oct 2, 2015 at 23:35
3
$\begingroup$

If you highlight all the brackets on the right side of what you want, and then do File->Save Selection As you should get this.

nb = CreateDocument[{TextCell["PDF Test", 
     "Section"], {Table[PieChart@Range@5, {7}]} // TableForm}];

enter image description here

I transposed the list so it reads left to right and put it in table form to get rid of the brackets.

nb = CreateDocument[{TextCell["PDF Test", 
     "Section"], {Table[PieChart@Range@5, {7}]} // TableForm}];

enter image description here

I'm not sure if I had to do this or not, but I made the mathematica window really large and stretched it off my screen so there was plenty of white space to the right of the image before selecting and saving. I think it might matter because my earlier saves still had brackets showing on the right side of the image.

EDIT: Just to be as clear as possible, this is what I meant by "highlight all the brackets."

enter image description here

Mathematica 10.0.0 Mac

$\endgroup$
1
  • $\begingroup$ (+1) This works with version 10.2 for Windows if I set the Magnification (Window ► Magnification) to 100%. $\endgroup$ Commented Oct 2, 2015 at 7:36
0
$\begingroup$

With some modifications.

nb = CreateDocument[
   Column[{TextCell["PDF Test", "Section"], 
     GraphicsRow[Table[PieChart@Range@5, {7}], ImageSize -> 700]}]];
$\endgroup$
1
  • $\begingroup$ Thanks, but this is a trick to reduce the content so that it fits in a letter sized paper. When you open the generated PDF and open the properties windows, you can see that the size is reported as 8.5x11" and not the specified PaperSize. $\endgroup$ Commented Oct 1, 2015 at 18:01

Your Answer

By clicking “Post Your Answer”, you agree to our terms of service and acknowledge you have read our privacy policy.

Not the answer you're looking for? Browse other questions tagged or ask your own question.