Solution 1: Using 3D Texture with Polygons
The idea is to use Polygon with 3D texture supported by Texture, but it requires a bit of undocumented hack to make it smooth.
The original data set is from Stanford Graphics Group website.
The dataset that has been used is CThead, 8-bit tiffs (download).
Before proceed, make sure that you have a plenty of memory (~500MB would be enough). Also, if you don't have a good graphics card, turning off 3D antialiasing (through "Preference" menu) will be helpful.
Step 1
Download slices into Mathematica (it takes a long time...).
filename = "cthead-8bit.tar.gz"; (* Appropriate path to the downloaded file *)
slices = Import[filename, #] & /@ Import[filename];
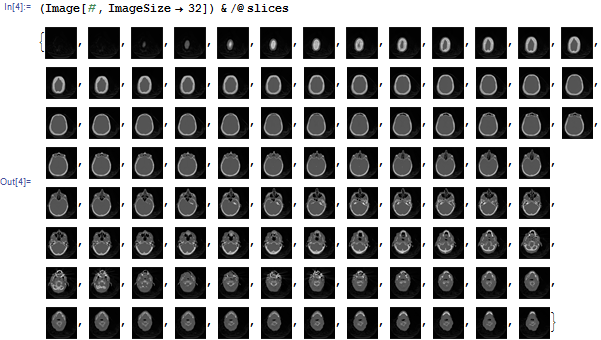
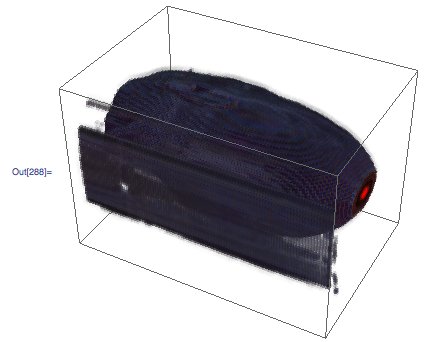
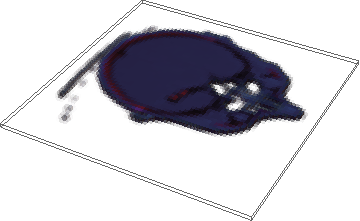
The images should look like this:
Step 2
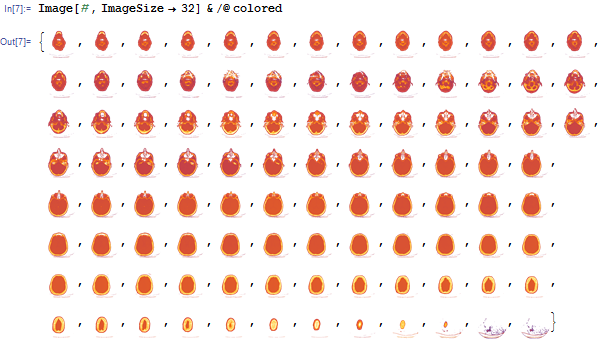
Let's apply some colors and transparency. We apply color function using Colorize, then add alpha channel based on binarized image using ColorCombine. Don't forget to specify the color space "RGB" (otherwise, the last channel will not be interpreted as opacity). Since it is a lot of slices, we will use ParallelMap. I am reversing the result to match the orientation.
colored =
  Reverse[ParallelMap[
    With[{img = #},
      ColorCombine[{
        Colorize[img, ColorFunction -> "SunsetColors"], Binarize[img]
        }, "RGB"]] &, slices]];
The result will look like this:
We will combine them and pack them so that it will make a nice volumetric color dataset. Again, notice that option DataReversed is used to reverse the orientation.
data = Developer`ToPackedArray[Map[ImageData[#, DataReversed -> True] &, colored]];
Step 3
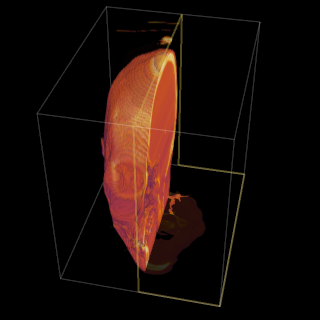
Basically, we put a lot of polygons with textures coming from this volumetric color dataset. But to make it work rather smooth, you need to use undocumented option BaseStyle -> {RenderingOptions -> {"DepthPeelingLayers" -> n}} (n being some reasonable number). I won't go deep into how this option works, I will just say that this sets limit on rendering of translucent polygons.
Here is the main code to display it:
(* All are in 0-1 coordinates. *)
(* top is z-value for x-y cutaway. *)
(* right is x value for y-z cutaway. *)
(* step defines how many polygon slices will be inserted. Smaller -> more *)
With[{top = 0.4, right = 0.4, rpad = -.2, step = 0.01},
 Graphics3D[{
   EdgeForm[],
   Opacity[.4], (* Overall transparency of the textured polygons *)
   Texture[data], (* Set volumetric texture *)

   (* Bottom part up until the variable top *)
   With[{pts = Table[{{0, 0, z}, {1, 0, z}, {1, 1, z}, {0, 1, z}}, {z, 0, top, step}]},
     Polygon[pts, VertexTextureCoordinates -> pts]
   ],

   (* Top part from top to 1, but from 0 to right in x direction *)
   With[{pts = Table[{{x, 0, top}, {x, 1, top}, {x, 1, 1}, {x, 0, 1}}, {x, 0, right, step}]},
     Polygon[pts, VertexTextureCoordinates -> pts]
   ],

   (* Cutaway decoration *)
   EdgeForm[Directive[Opacity[.6, RGBColor[1., .8, .1]], Thick]],
   FaceForm[],
   Polygon[{{right, 0, top}, {1 + rpad, 0, top}, {1 + rpad, 1, top},
     {right, 1, top}, {right, 1, 1}, {right, 0, 1}}]
 },
 PlotRange -> {{0, 1 + rpad}, {0, 1}, {0, 1}},
 Lighting -> "Neutral", Background -> Black,
 RotationAction -> "Clip", SphericalRegion -> True,
 BoxStyle -> Directive[Opacity[.2], White],
 ImageSize -> 4 {100, 100},
 (* Rendering option for smooth volumetric rendering *)
 BaseStyle -> {RenderingOptions -> {"DepthPeelingLayers" -> 100}},
 BoxRatios -> {1 + rpad, 1, .9}]
]
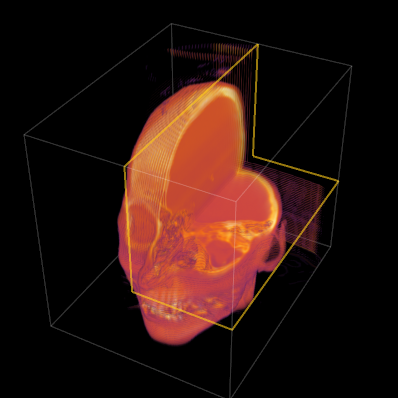
Here is the result:
Warning: Be very careful of decreasing step or increasing DepthPeelingLayers and ImageSize. It will crash the Front End...
Solution 2: Using CUDAVolumetricRender
It is a limited solution for the people who has CUDA capable graphics cards. Essentially, it will call CUDAVolumetricRender function which is a part of CUDALink.
Step 0
We need to load the CUDALink package.
<<CUDALink`
The following line will make it sure that you get the latest CUDA paclet.
CUDAResourcesInstall[Update -> True]
It takes a long time to download full paclet, so if you are sure that your CUDA distribution is up to date (CUDAResourcesInstall[] returns 8.0.4.2, as of 5/31/2012), then you can skip this step.
Step 1
Download slices into Mathematica (the same as above).
filename = "cthead-8bit.tar.gz"; (* Appropriate path to the downloaded file *)
slices = Import[filename, #] & /@ Import[filename];
Step 2
Create a volume data suitable for the CUDAVolumetricRender. First, the data should be a packed integer array with depth 3, each element should range from 0 to 255 (0 being background). Since original data is already in 0-255 range (8-bit TIFF), you can use ImageData[..., Automatic] to take original values out. Otherwise, you can use ImageData[..., "Byte"] to enforce it to be in byte range.
data = Developer`ToPackedArray[Map[ImageData[#, Automatic] &, slices]];
Here is a slight problem. Apparently there is a bug. To render $d \times h \times w$ voxel data, you need to partition it again, so that the data would have $h \times w \times d$ dimension. We are not talking of transposing it, instead, literally we just need to change dimension, without touching data order. It is hard to explain and no need to understand, so I will just provide a conversion function here:
Clear[prepareCUDAVolumeData];

prepareCUDAVolumeData::arg =
  "The argument should be an integer array of depth 3.";

prepareCUDAVolumeData[array_] /; ArrayQ[array, 3, IntegerQ] :=
  Module[{x, y, z}, {x, y, z} = Dimensions[array];
   Developer`ToPackedArray[
    Partition[#, x] & /@ Partition[Flatten[array], x*z]]];

prepareCUDAVolumeData[___] /; (Message[prepareCUDAVolumeData::arg];
    False) := Null;
Step 3
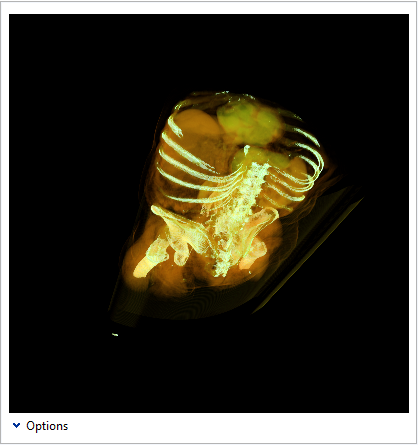
Now, we are ready. Let's try this:
CUDAVolumetricRender[prepareCUDAVolumeData[data]]
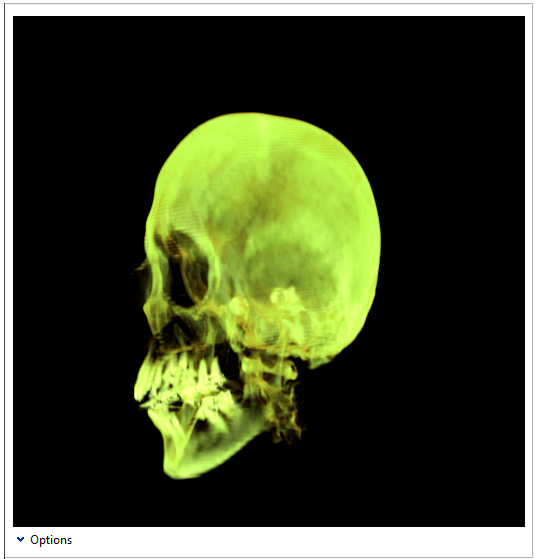
Here is the result (with some parameter tweak):
The problem with this approach is that you don't have much flexibility except what is given by the interface.
Note: The volume rendering support in Mathematica 8 is quite limited (without CUDALink). Technically, it is not really volumetric rendering in traditional sense. A proper volumetric rendering requires a transfer function which converts accumulation of density values into certain color per each pixel. Here, we are mimicking the effect by using false coloring and alpha blending. The CUDALink volume rendering is a real deal, but you don't really need CUDA as long as graphics cards supports shader language (which is mostly true nowadays).
Note 2: You can expect much improved (and proper) volumetric support in the future... ;)


 "
"
CUDAVolumetricRenderyou were talking about in your question. Please remove if you don't like it. It really is an impressive volumetric renderer. $\endgroup$CUDAVolumetricRenderoutput is actually mouse-rotatable? $\endgroup$