How does one convert a Graphics3D object into an Image3D object? E.g., start with Plot3D[x^2 - y^2, {x, -1, 1}, {y, -1, 1}].
4 Answers
If you already have a Graphics3D object, then you can recreate an Image3D object by stacking slices of your graphics along an axis. Here's an example. We start with your object:
obj = Plot3D[x^2 - y^2, {x, -1, 1}, {y, -1, 1}]
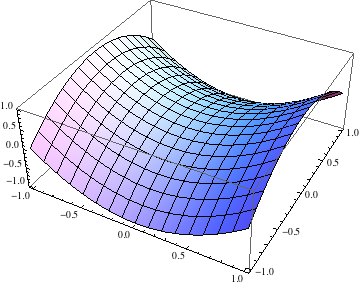
Using the following rudimentary "slice" function, we can generate slices of the function at a given value of $x$:
slice[obj_, x_, dx_] := Show[obj, ViewPoint -> {∞, 0, 0},
    PlotRange -> {{x, x + dx}, All, All}, Axes -> False, Boxed -> False]

slice[obj, 0, 0.01]
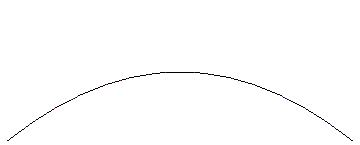
Now generate such slices for all $x$, rasterize and grab the ImageData and stack the frames:
frames = Table[ImageData@Thinning@ColorNegate@ColorConvert[#, "Grayscale"] &@
    Rasterize@slice[obj, x, 0.05], {x, -1, 1, 0.01}];

Image3D[frames]
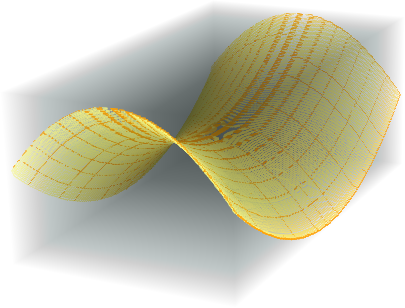
As you can see, the reconstruction is not perfect, and this arises from having to artificially sample the Graphics3D object by manipulating the plot ranges. Depending on how quickly the function changes within the chosen dx, the reconstruction could get worse/better. Note that you also need to choose the sampling such that the aspect ratio is maintained (I have only eyeballed it).
A much better reconstruction can be obtained either by generating frames using Plot (you probably can't avoid the Moiré patterns):
frames2 =
  Table[ImageData@Thinning@ColorNegate@ColorConvert[#, "Grayscale"] &@
    Rasterize@
     Plot[x^2 - y^2, {x, -1, 1}, PlotRange -> {-1.5, 1.5},
      Axes -> False, Frame -> False], {y, -1, 1, 0.01}];

Image3D[frames2]
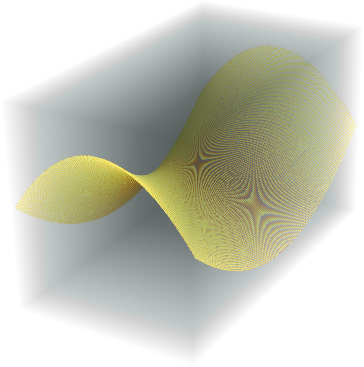
or by directly obtaining the samples as Kuba showed.
-
$\begingroup$ that's a start. I'll hold off accepting this in the hope of finding a solution that provides a much more faithful rendering of the
Grahics3Dobject. $\endgroup$– murrayCommented Oct 1, 2013 at 13:09 -
$\begingroup$ @murray Certainly. Could you perhaps explain why you want to convert to an
Image3D? I'm not seeing any advantages to it overGraphics3D, but maybe I'm just being thick... $\endgroup$– rm -rf ♦Commented Oct 1, 2013 at 13:57 -
$\begingroup$ @R.M. Because we can use
Manipulateto inspect a 3D object slice by slice? $\endgroup$ Commented Jan 20, 2016 at 8:50 -
$\begingroup$ @matheorem, and
ClipPlanesis insufficient for your needs? Honestly, going from vector to raster is quite the step down here. $\endgroup$ Commented Jun 26, 2016 at 20:41 -
$\begingroup$ In 11.3,
Image3D[frames1]is just giving me a fuzzy gray blur of a parallelepiped, with no hint of the saddle surface. AndImage3D[frames1]is not starting with the givenGraphics3Dobject. $\endgroup$– murrayCommented Aug 8, 2018 at 14:20
You could create a region using DiscretizeGraphics and find points within a certain distance of the surface using RegionDistance
g = Normal @ Plot3D[x^2 - y^2, {x, -1, 1}, {y, -1, 1}];

f = RegionDistance @ DiscretizeGraphics @ g;

data = Array[f[{##}] &, {60, 60, 60}, {-1.1, 1.1}];

Image3D[Clip[data, {0.05, 0.05}, {1, 0}]]
-
$\begingroup$ The expression
DiscretizeGraphics@ggenerates error message for me: "DiscretizeGraphics: The function DiscretizeGraphics is not implemented for Directive[Specularity...." $\endgroup$– murrayCommented Jun 27, 2016 at 14:52 -
$\begingroup$ In version 11,we should drop that
Normaland the surface have a thickness? $\endgroup$– yodeCommented Nov 15, 2016 at 10:10 -
$\begingroup$ In 11.3 (whether with or without the
Normal, the resultingImage3Dcompletely changes the oriientation of the saddle surface. $\endgroup$– murrayCommented Aug 8, 2018 at 14:24
Here's something more fun than practical.
We can simulate an MRI / CT scanner by reconstructing from projected images.
g = AnatomyPlot3D[Entity["AnatomicalStructure", "LeftFemur"], PlotTheme -> "XRay"]
Note that it's important to have some sort of transparency in the objects being 'scanned'. This will better simulate an x-ray.
Normally a CT will only perform a half rotation, but here we will combine 2 CTs by taking a full rotation. This will give a higher quality result. Here are the simulated x-rays:
projectGraphic[g_, α_] := Show[g, ViewPoint -> {Cos[α], Sin[α], 0},
  ViewProjection -> "Orthographic", SphericalRegion -> True, ViewAngle -> 1.6]

fcnt = 64;
rsz = 180;

projections = Monitor[
  Table[
    Rasterize[projectGraphic[g, α], RasterSize -> rsz, ColorSpace -> "Grayscale"],
    {α, 0, 2π - π/fcnt, π/fcnt}
  ],
  ProgressIndicator[α, {0, 2π}]
];

ListAnimate[projections]
Now we can create the slices:
radons1 = Image3DSlices[ImageRotate[Image3D[projections[[1 ;; fcnt]]], {π/2, {0, -1, 0}}], All, 2];
slices1 = InverseRadon /@ radons1;

radons2 = Image3DSlices[ImageRotate[Image3D[projections[[fcnt+1 ;; -1]]], {π/2, {0, -1, 0}}], All, 2];
slices2 = InverseRadon /@ radons2;
Reconstruct the orignal object by combining both CT scans:
recon = ImageAdjust @ ImageMultiply[
  Image3D[slices1],
  ImageRotate[Image3D[slices2], π]
];

Image3D[RidgeFilter[recon], BoxRatios -> {1, 1, 1.7}] // ImageAdjust
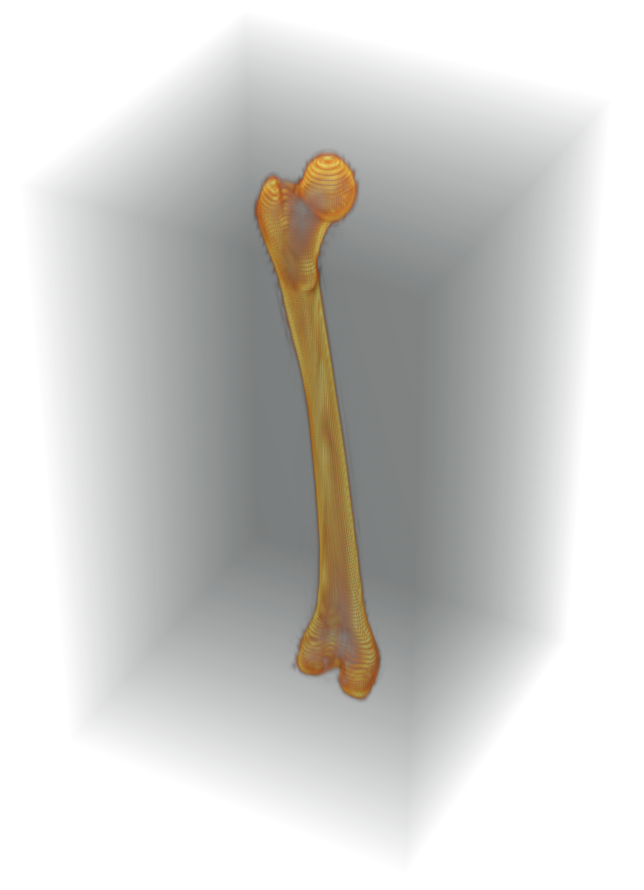
As of version 11.2 there's RegionImage.
g = Plot3D[x^2 - y^2, {x, -1, 1}, {y, -1, 1}];

RegionImage[DiscretizeGraphics[g]]
-
1$\begingroup$ This works - "sort of ": it is very slow, and the result, which does have head
Image3Dhas an unwanted Moire-like pattern on the surface and an unwanted light-gray parallelepiped-shaped blob filling the box. $\endgroup$– murrayCommented Aug 8, 2018 at 14:26 -
1$\begingroup$ @murray, "an unwanted light-gray parallelepiped-shaped blob filling the box" - at least for that part, you just need to change the
ColorFunctionsetting:Image3D[RegionImage[DiscretizeGraphics[g]], ColorFunction -> "WhiteBlackOpacity"]$\endgroup$ Commented Mar 28, 2019 at 4:00 -
2$\begingroup$ @murray The Moire-like pattern comes from antialiasing.
RegionImagereturns a grayscale image where a voxel value indicates how much of the region intersects with it. In addition toColorFunction, changing volume lighting can help hide this effect:Image3D[RegionImage[DiscretizeGraphics[g]], Method -> {"VolumeLighting" -> "EnhancedEdge", "InterpolateValues" -> True}]. $\endgroup$ Commented Mar 28, 2019 at 15:59 -
1$\begingroup$ And FWIW specifying a thicker surface with
RegionImage[DiscretizeGraphics[g], Method -> {"Thickness" -> 3}]seems to speed things up. $\endgroup$ Commented Mar 28, 2019 at 16:02

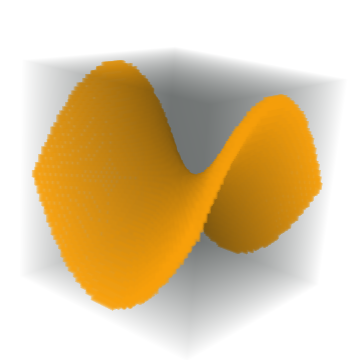

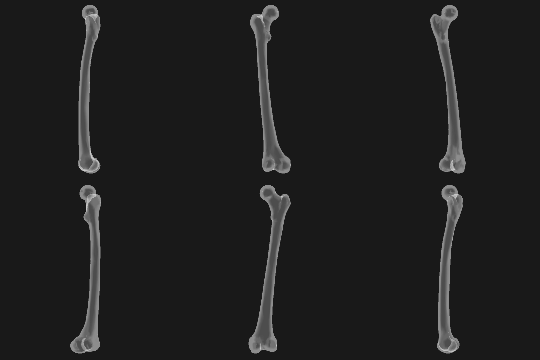
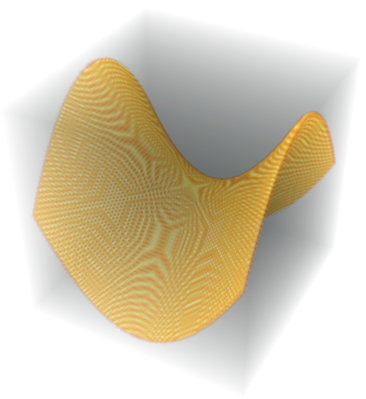
Image3Dobjects from some 4D arrays of reals, and of course usingImportwith a data object that is already"Image3D") $\endgroup$Image3Dobject if you already have aGraphics3Dobject -- not how you obtain anImage3Dobject by starting with a function of 3 variables and picking points as in your example withUnitStep. $\endgroup$