19
$\begingroup$

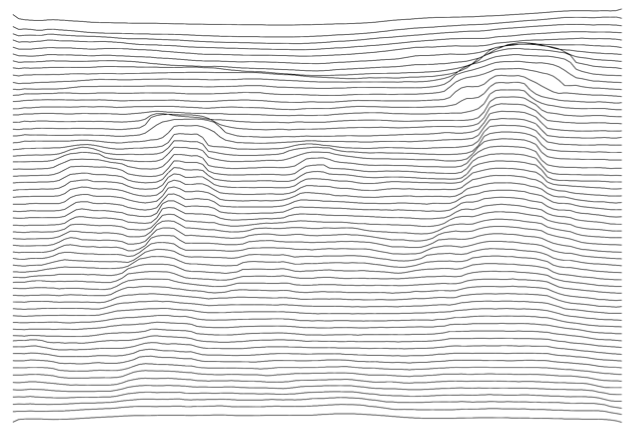
So here's somewhat of the general goal first: Here's an example of image-based line patterns Here is an example of an artists work in creating imagery using only lines bent as though distorted by an actual 3D form.

Seemed to me that something like this could be accomplished in Mathematica using a 2D image and a line pattern.

Processing the 2D image in such a way as to maintain the edges then use some of the original pixel luminance to extrude a depth map. Then use this new 3D form to deform the line pattern and create this artistic effect.

Here's an image to begin with:link

Here's some code that may (or may not) get the creative juices flowing. converting Images

In my application, I will need to use a second image to warp over the new 3D form because the pattern effect is going to be very different than this example image.

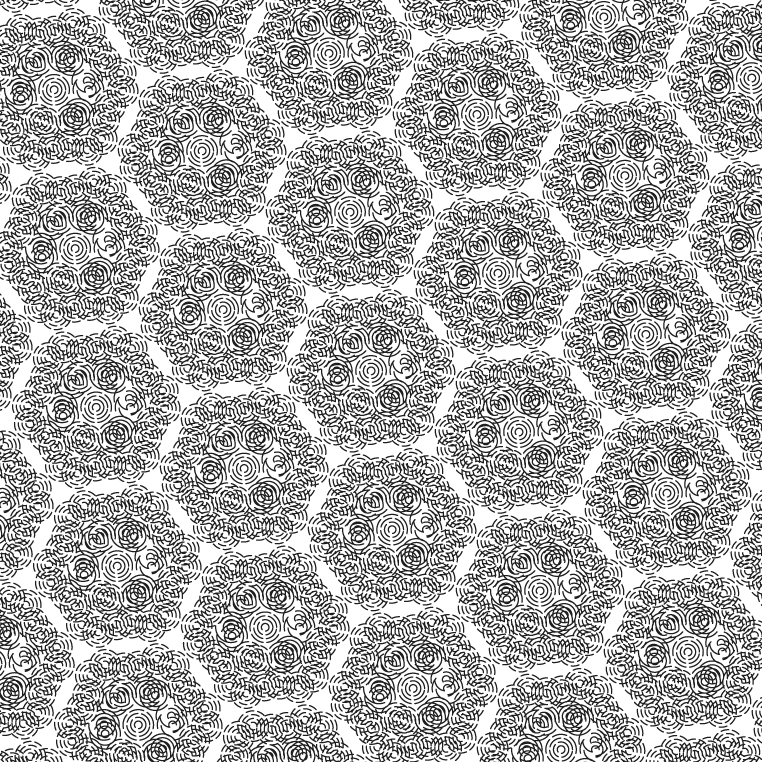
Here is an example of a grayscale image pattern to be used on this type of work. Grayscale patterned image

The end result/goal is a warped 3D pattern only which shows the details of the previous image clearly (similar to the artistic example).

$\endgroup$
10
  • 2
    $\begingroup$ Depth map is also easily done via resources.wolframcloud.com/NeuralNetRepository/resources/… $\endgroup$
    – Carl Lange
    Commented Mar 11, 2019 at 16:41
  • $\begingroup$ and this can be done for the edge details: Manipulate[EdgeDetect[image, r, t], {{r, 2, "radius"}, 1, 10}, {{t, 0.1, "threshold"}, 0, 0.5}] $\endgroup$ Commented Mar 11, 2019 at 16:56
  • $\begingroup$ I do need to be able to convolve an image of lines because although the example image is nice, the use case is different and thus the line pattern would have to be different. $\endgroup$ Commented Mar 11, 2019 at 17:37
  • 1
    $\begingroup$ You should also give ImageRestyle a shot. If it has enough time I think it could do a really nice job of this. $\endgroup$
    – Carl Lange
    Commented Mar 11, 2019 at 17:39
  • $\begingroup$ Can you give a few examples of "any grayscale image pattern provided"? I think that is where the disconnect between these answers and your hoped-for solution lies. $\endgroup$
    – Carl Lange
    Commented Mar 13, 2019 at 17:18

4 Answers 4

18
$\begingroup$

Other approach using NetModel:

net = NetModel[
   "Single-Image Depth Perception Net Trained on NYU Depth V2 and \
Depth in the Wild Data"];

enter image description here

Create depthMap and build an interpolation function:

depthMap = net[image];    
depthFunc = 
  Interpolation[
   Flatten[MapIndexed[{#2, #1} &, -Reverse@depthMap, {2}], 1]];

Apply depthFunc to line segments and plot it:

lines = Table[{j, i, 7 depthFunc[i, j]}, {i, 1, 240, 4}, {j, 1, 320, 
3}];

lineart3d = 
 Graphics3D[{AbsoluteThickness[2], 
   GeometricTransformation[Line[lines], 
    RotationTransform[-Pi/12, {1, 0, 0}]]}, ViewPoint -> Top, 
  ViewProjection -> "Orthographic", Boxed -> False, ImageSize -> 500]

enter image description here

You can rasterize if you want a 2d image:

Rasterize[lineart3d, ImageResolution -> 300]

enter image description here

$\endgroup$
3
  • $\begingroup$ +1 Nice work halmir! I do need to change the type of line pattern from the example image, so if you can edit your answer to allow for that we may just have a winner! $\endgroup$ Commented Mar 11, 2019 at 18:30
  • 2
    $\begingroup$ You could modify magnifying value and allow negative. $\endgroup$
    – halmir
    Commented Mar 11, 2019 at 18:50
  • $\begingroup$ Very nice given the complexity of the original image. $\endgroup$
    – yarchik
    Commented Oct 4, 2020 at 21:07
16
$\begingroup$

Here's my attempt, which uses the neural net Carl Lange referred to, plots mesh lines with ListPlot3D, and finds a 'nice' view point to see the lines.

net = NetModel["Single-Image Depth Perception Net Trained on NYU Depth V2 and Depth in the Wild Data"];
img = Import["https://www.liveenhanced.com/wp-content/uploads/2017/12/Beauty-Of-Bears-Ears-National-Monument.jpg"];
{x, y} = ImageDimensions[img];

height = 1 - Rescale[ArrayResample[net[img], Round[{x, y}/4]]];

meshlines = ListPlot3D[
  400 Reverse[height], 
  Mesh -> 100, MeshFunctions -> {#2 &}, 
  DataRange -> {{0, x}, {0, y}}, PlotStyle -> None
];

mr = DiscretizeGraphics[meshlines, 
  MeshCellStyle -> {1 -> Black}, PlotTheme -> "Lines"];

M = MomentOfInertia[Point[MeshCoordinates[mr]]];

{v1, v2} = Rest[Eigenvectors[M]];

Show[mr, ViewVertical -> {0, 0, -1}, 
  ViewPoint -> {0, 10, 10} Normalize[Cross[v1, v2]]]
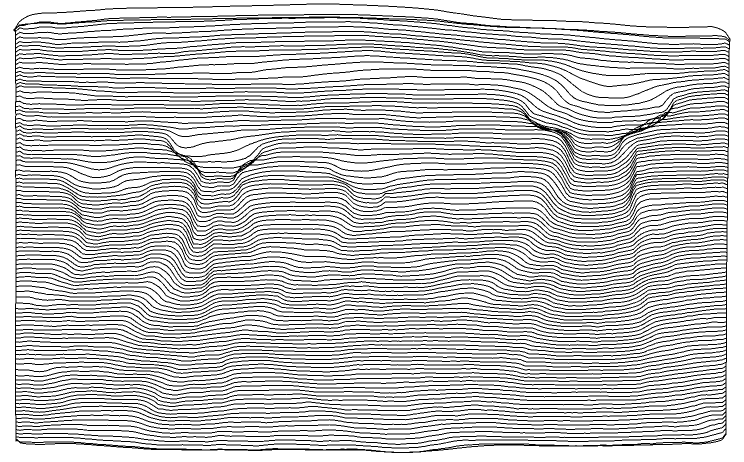
enter image description here

It might be possible to accentuate the detail better by finding a suitable power to raise height to, e.g. height^2, etc.


Here's a way to project into 2D, rather than adjusting the ViewPoint in 3D:

MeshRegion[
  -PrincipalComponents[MeshCoordinates[mr]][[All, 1 ;; 2]], 
  MeshCells[mr, 1], 
  PlotTheme -> "Lines", MeshCellStyle -> {1 -> Black}
]
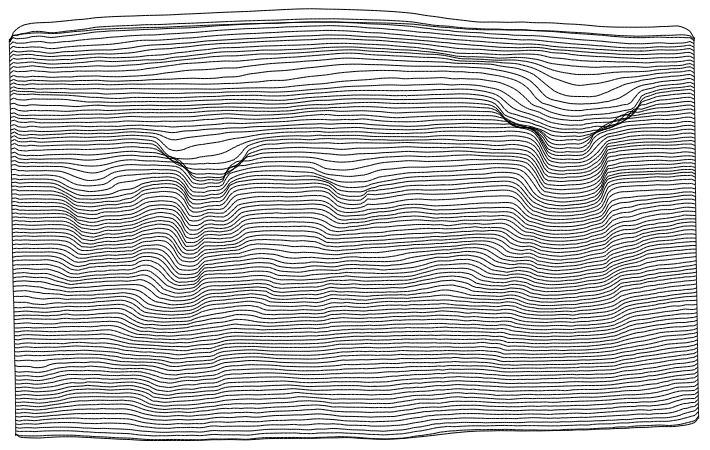
enter image description here


Here's a way to add some smooth edge lines. There's room for improvement here -- both in the implementation and output -- and the high degree splines take some time to render.

The idea is to edge detect, break up branch points to get a collection of path curves, approximate each path with a smooth curve, then map into 3D.

boundary = Thinning[EdgeDetect[im, 10]];

brokenboundary = ImageMultiply[boundary, ColorNegate[MorphologicalBranchPoints[boundary]]];

ones = Position[Reverse[Transpose[ImageData[brokenboundary]], {2}], 1];

g = NearestNeighborGraph[ones, {All, 1.5}];

comps = WeaklyConnectedGraphComponents[g];

paths = FindHamiltonianPath /@ comps;

hmap = ListInterpolation[400 Reverse[Transpose[height], {2}], {{0, x}, {0, y}}];
paths3d = Apply[{##, hmap[##]} &, paths, {2}];

Show[
  mr, 
  Graphics3D[{AbsoluteThickness[1], BSplineCurve[#, SplineDegree -> Length[#] - 1] & /@ paths3d}], 
  ViewVertical -> {0, 0, -1}, 
  ViewPoint -> {0, 10, 10} Normalize[Cross[v1, v2]]
]
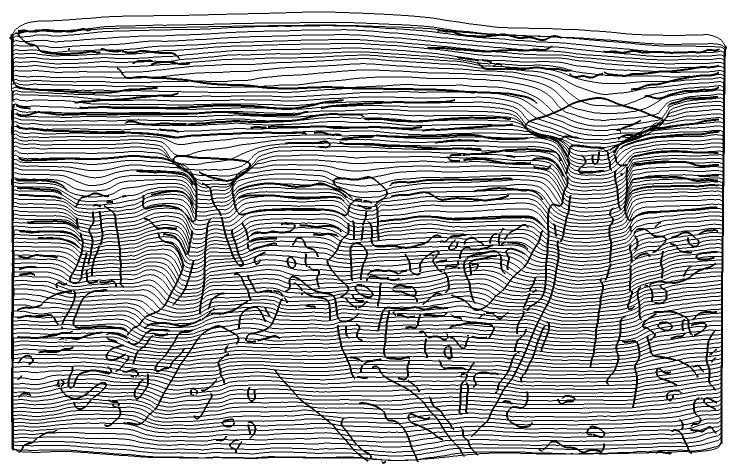
enter image description here

$\endgroup$
6
  • $\begingroup$ This is really nice, great work! $\endgroup$
    – Carl Lange
    Commented Mar 11, 2019 at 17:51
  • $\begingroup$ @CarlLange Thanks! $\endgroup$
    – Greg Hurst
    Commented Mar 11, 2019 at 17:55
  • $\begingroup$ +1 Nice work Chip! In my case, I do need to use an image for the pattern of lines since that will need to be different. Possibly adding EdgeDetect to gain a more defined shape definition like the example image. $\endgroup$ Commented Mar 11, 2019 at 18:09
  • $\begingroup$ @RHall do you mean have some edge lines in addition to the horizontal ones? $\endgroup$
    – Greg Hurst
    Commented Mar 11, 2019 at 19:53
  • $\begingroup$ Yes, I have a large number of pattern images that I would use instead of the example provided. $\endgroup$ Commented Mar 11, 2019 at 19:58
14
$\begingroup$

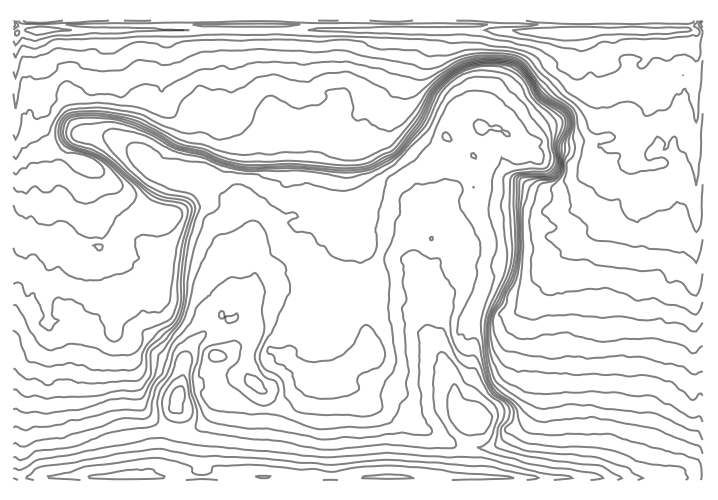
We can get some of the way there by using ListContourPlot.

enter image description here

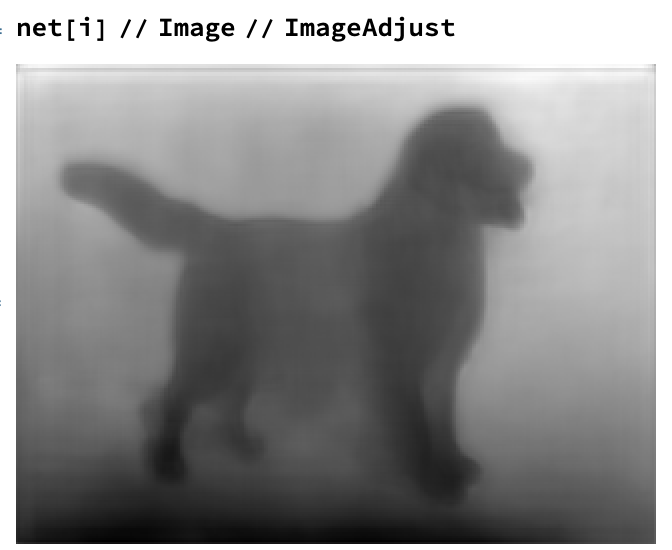
Now we grab a neural network to get the depth map for us:

net = NetModel[
  "Single-Image Depth Perception Net Trained on NYU Depth V2 and Depth in the Wild Data"]

Now we can see our depth map:

enter image description here

Great. Let's put that in a list, after a little bit of cajoling (Blurring, ImageAdjusting so it's all between 0 and 1)

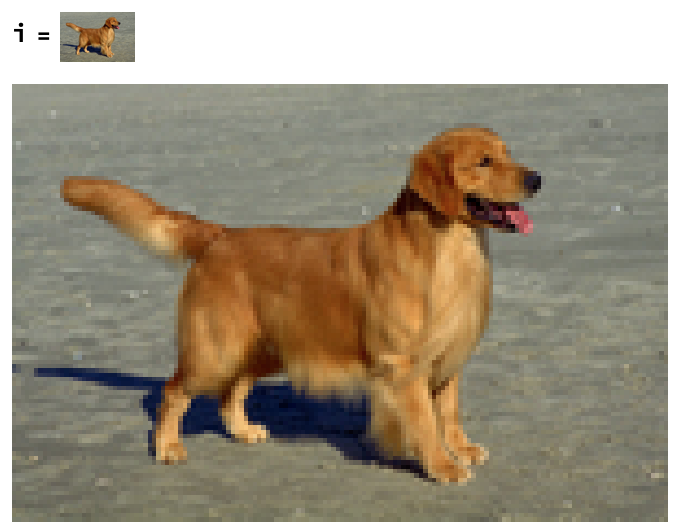
depth = ImageData@Blur@ImageAdjust@Image@net[i]

Now we can try and ListContourPlot it:

ListContourPlot[Reverse@depth, Contours -> 25, 
 ColorFunction -> (White &), Axes -> None, Frame -> None, 
 AspectRatio -> ImageAspectRatio@i]

enter image description here

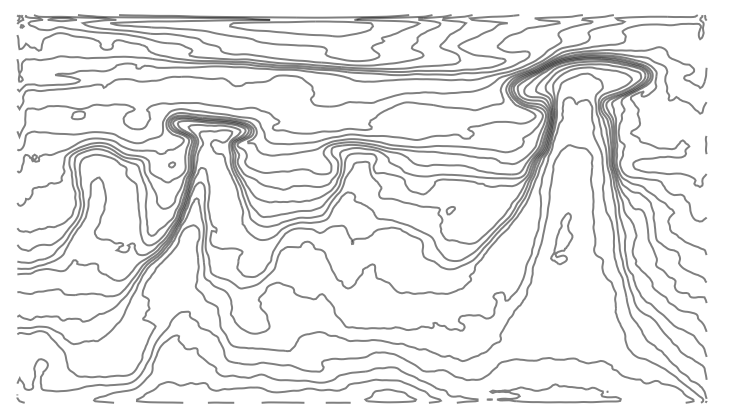
Or, with the image you linked to:

enter image description here

Other options I thought about but didn't execute on:

  • convolving an image of lines with the depth map
  • converting the depthmap to a weighted graph and using FindShortestPath (I still like this one, but I think the output would be pretty similar to this attempt)
  • There's always good old ImageRestyle, which if given enough time might do a really nice job of this...
$\endgroup$
1
  • $\begingroup$ I like this! I do need to be able to convolve an image of lines though because although the example image is nice, the use case is different and thus the line pattern would have to be different. $\endgroup$ Commented Mar 11, 2019 at 17:37
12
$\begingroup$

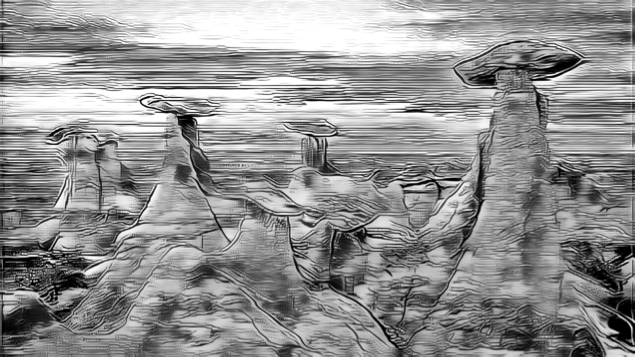
ImageRestyle is an obvious thing to try:

img = Import["https://www.liveenhanced.com/wp-content/uploads/2017/12/Beauty-Of-Bears-Ears-National-Monument.jpg"];
imgBW = ColorConvert[img, "Grayscale"];
imgLines = Import["https://i.sstatic.net/bR9kS.png"];
ColorConvert[ImageRestyle[imgBW, imgLines], "Grayscale"]

enter image description here

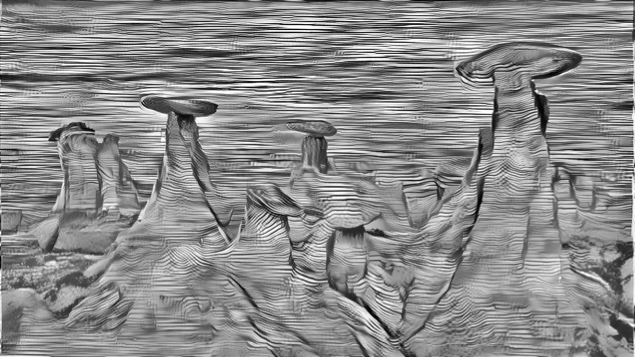
If you are willing to wait a while, ImageRestyle has options:

resty = ImageRestyle[imgBW, imgLines, PerformanceGoal -> "Quality"]; 
ColorConvert[resty, "Grayscale"]

enter image description here

$\endgroup$
1
  • $\begingroup$ Good attempt Bill, Trying this method doesn't provide the distorted pattern only. Seems some of the first image is left to show through the effect. The line pattern should end up as a single distorted 3D object. $\endgroup$ Commented Mar 11, 2019 at 20:56

Your Answer

By clicking “Post Your Answer”, you agree to our terms of service and acknowledge you have read our privacy policy.

Not the answer you're looking for? Browse other questions tagged or ask your own question.