4
$\begingroup$

I was trying to define the same decorative toolbar as it is pictured here in stylesheet. I succeed to do so. Now, I want to define custom decorative toolbar in the Default stylesheet using the same approach.

I used this code in cell expression form

Cell[BoxData[ToBoxes[image] /. {(ImageSize -> {___, ___}) -> (ImageSize -> \{1399, 24})}], "DockedCell", Background -> White, ImageMargins -> 0, CellMargins -> {{0, 0}, {0, 0}}, CellFrameMargins -> {{0, 0}, {0, 0}}] // CellPrint

Please note that instead of "image" in the code I used actual image.
I copied this part from code above

RasterBox[CompressedData["1:eJ....SPo="], {{0, 232}, {1833, 0}}, {0, 255},
      ColorFunction->RGBColor] (*"1:eJ....SPo=" - too long to show*)

to

Cell[StyleData[All, "Working"], Editable->True, 
CellInsertionPointCell->FEPrivate`FrontEndResource[
"FEExpressions", "CellInsertionMenu"],
DockedCells->{Cell[BoxData[GraphicsBox[TagBox[place for code above,
BoxForm`ImageTag["Byte", Interleaving -> True, ColorSpace -> "RGB"], 
Selectable -> False], BaseStyle -> "ImageGraphics", 
ImageSize -> {1399, 250}, 
ImageSizeRaw -> {1399, 250}, 
PlotRange -> {{0, 1399}, {0, 250}}]]]}]

placed in the custom stylesheet notebook in the section Style Enviroment Names, Working.

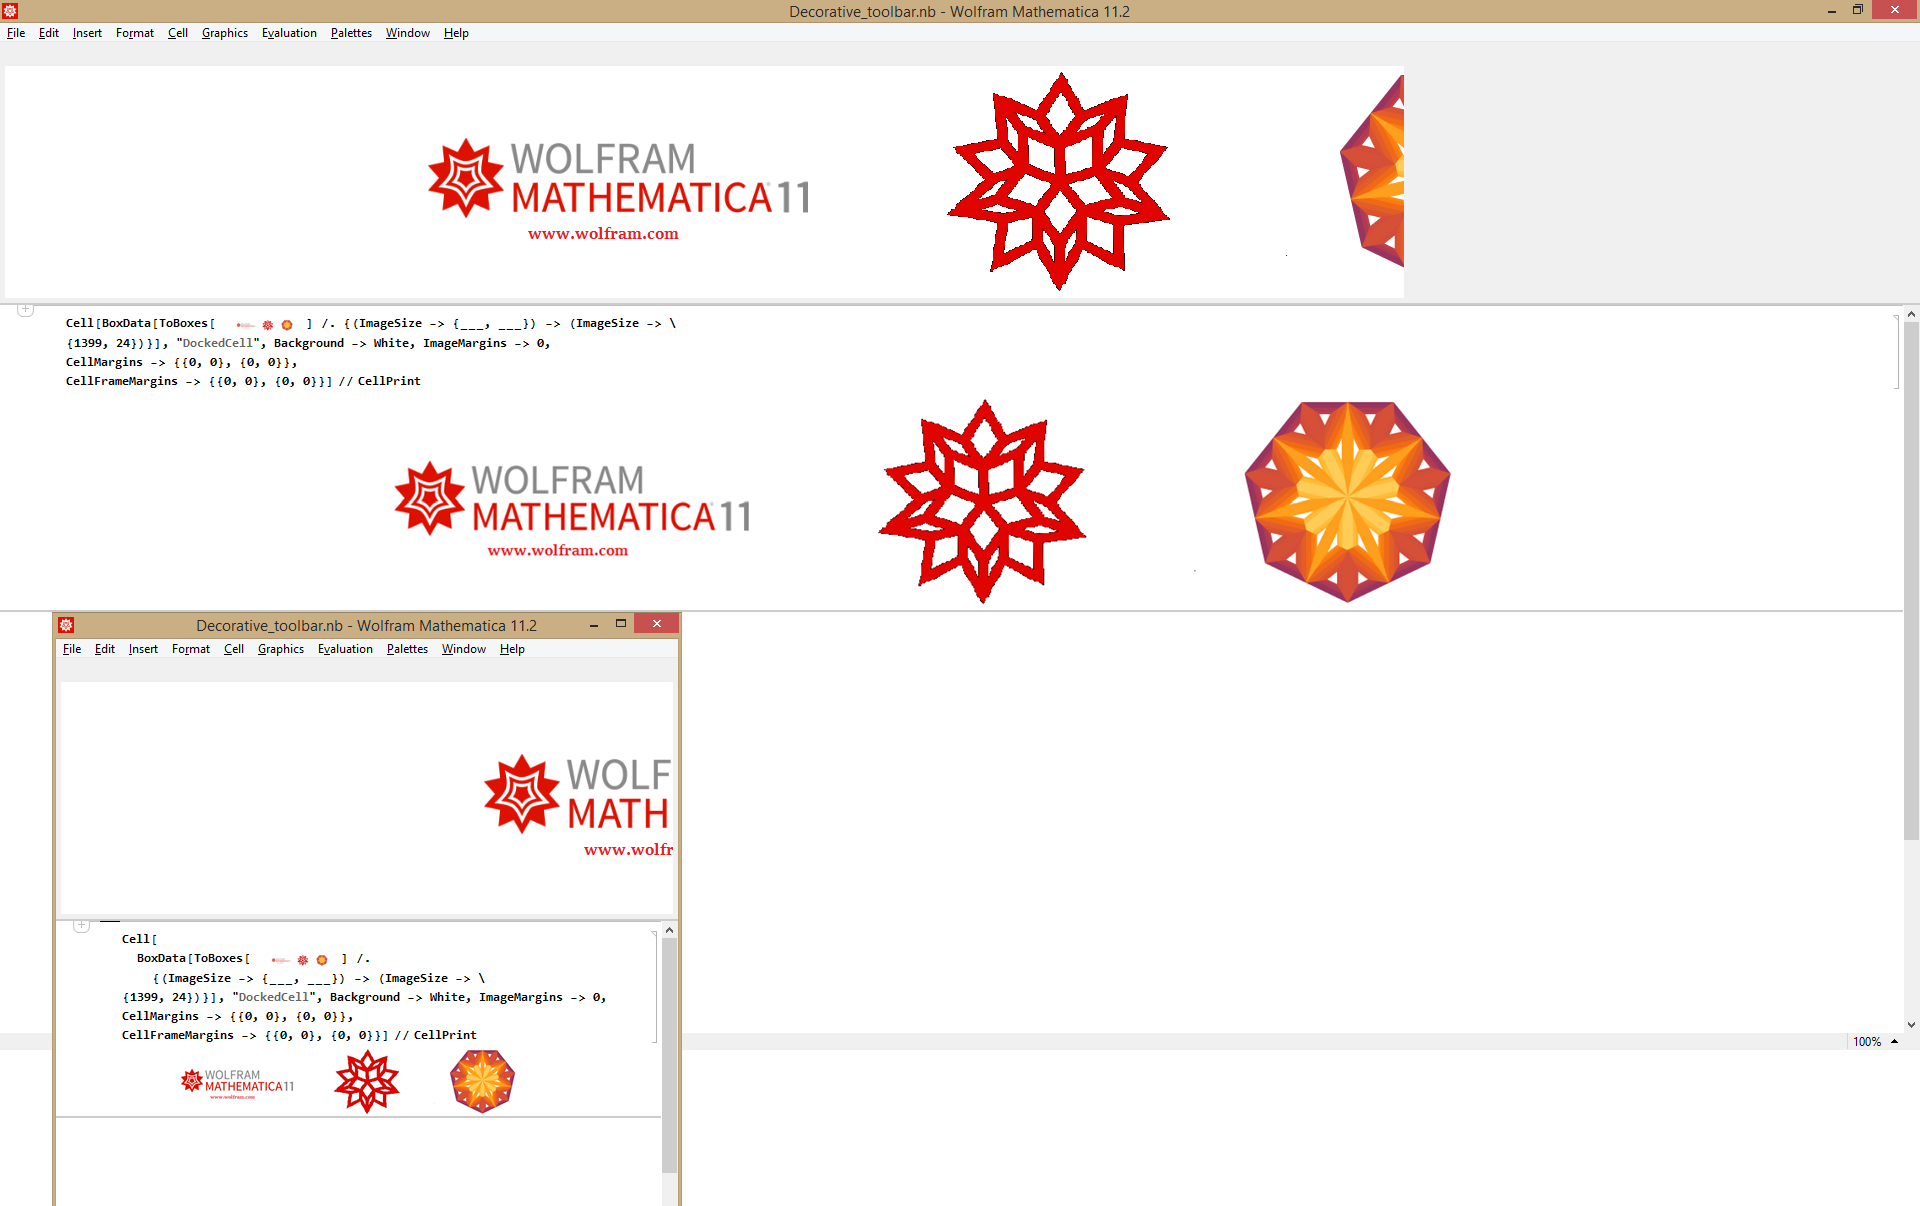
The problem is that the docked decorative toolbar is not scalable in contrast to created decorative toolbar in notebook. enter image description here
I put the corresponding notebook file and stylesheet notebook here
I will be grateful for any advice.

$\endgroup$
6
  • $\begingroup$ Sorry but I’m not entirely sure what your issue is. How do you need it to scale and in response to what? I think the issue is likely resolvable, whatever it is, I just don’t know what it is :) $\endgroup$
    – b3m2a1
    Commented Jun 24, 2018 at 1:46
  • $\begingroup$ @b3m2a1 The issue is that the toolbar at the top (the one defined in the stylesheet) does not behave in the same way as the other (at the "bottom" ) toolbar created in the notebook. The other toolbar can adapt to the notebook window ( the window can be maximized, size changed and the bottom toolbar nicely follows this change of window). The issue can be seen in the picture - not all logos are displayed or only the part of the logo is displayed at the top toolbar. $\endgroup$
    – Moonwalk
    Commented Jun 24, 2018 at 7:26
  • $\begingroup$ Okay it sounds to me like you just want it to recenter and shrink itself. Is this right? If so I have an easy fix. $\endgroup$
    – b3m2a1
    Commented Jun 24, 2018 at 7:46
  • $\begingroup$ @b3m2a1 Yes, I think this will solve the problem. $\endgroup$
    – Moonwalk
    Commented Jun 24, 2018 at 7:50
  • $\begingroup$ Okay. I’ll help you with this tomorrow when I have access to Mathematica. The trick will be to wrap the expression in Pane and use ImageSize->FEPrivate`Part[FrontEnd`AbsoluteCurrentValue[FrontEnd`EvaluationNotebook[], WindowSize], 1], ImageSizeAction->”ShrinkToFit”, and Alignment->Center but I’ll need to debug that and get it all working just right. $\endgroup$
    – b3m2a1
    Commented Jun 24, 2018 at 7:54

1 Answer 1

2
$\begingroup$

Here's a way to do it. First we'll use this as our DockedCell expression:

newDockedCell =
  Cell[
   BoxData@ToBoxes@
     Pane[
      Import["https://i.imgur.com/LUIaEdC.png"],
      ImageSize ->
       {
        FEPrivate`Part[
         FrontEnd`AbsoluteCurrentValue[FrontEnd`EvaluationNotebook[], 
          WindowSize],
         1],
        Automatic
        },
      ImageSizeAction -> "ShrinkToFit",
      Alignment -> Center
      ]
   ];

Then just add these style edits to the stylesheet however you like. This is my preferred short-hand (using custom package-level functions), but the easiest thing is just to do it manually as you have done:

StyleSheetEdit[
 "Notebook",
 DockedCells ->
  newDockedCell,
 "MakeCell" -> True
 ]

StyleSheetEdit[
 "DockedCell",
 {
  CellFrameMargins -> 0,
  Background -> White
  },
 "MakeCell" -> True
 ]

The key here is this:

FEPrivate`Part[
 FrontEnd`AbsoluteCurrentValue[FrontEnd`EvaluationNotebook[], 
  WindowSize],
 1]

That will be computed by the front-end directly and give the notebook width.

By setting these:

ImageSizeAction -> "ShrinkToFit",
Alignment -> Center

The Pane will force the content to be centered and take on that size and shrink if constrained.

You can see from these that it works:

small

medium

large

Getting this into the stylesheet:

This can be a little annoying to add to the stylesheet, so here's an effective way to do this:

  • Go to the stylesheet
  • Find the style CellObject for "Notebook". This can be most easily gotten via PreviousCell or NextCell.
  • Run this:

SetOptions[thatCell, DockedCells->newDockedCell]
  • Select that cell and toggle Show Expression on and off

It should work after that

$\endgroup$
4
  • $\begingroup$ @Moonwalk see the update for getting it into the stylesheet $\endgroup$
    – b3m2a1
    Commented Jun 26, 2018 at 17:39
  • $\begingroup$ Thank you for having patience with me. In the third step I should wrap thatCell around with SetOptions[ ,DockedCells->newDockedCell] in the stylesheet notebook. So the expression will look like SetOption[Cell[StyleData["Notebook"]...], DockedCells->Cell[BoxData@ToBoxes@Pane....]. Am I right? $\endgroup$
    – Moonwalk
    Commented Jun 27, 2018 at 7:17
  • $\begingroup$ @Moonwalk no thatCell is the CellObject. For instance to find that you can run PreviousCell[] right below it. Or you can simply put the cursor right below the target cell and run SetOptions[PreviousCell[], ...] $\endgroup$
    – b3m2a1
    Commented Jun 27, 2018 at 7:42
  • $\begingroup$ Thank you again. It is working :) $\endgroup$
    – Moonwalk
    Commented Jun 27, 2018 at 8:42

Your Answer

By clicking “Post Your Answer”, you agree to our terms of service and acknowledge you have read our privacy policy.

Not the answer you're looking for? Browse other questions tagged or ask your own question.